Share any homemade glam tips, whether they're your own or you find them somewhere else!

"What is the quality of your intent?" - Thurgood Marshall

"What is the quality of your intent?" - Thurgood Marshall


 Of all our inventions for mass communication,


"What is the quality of your intent?" - Thurgood Marshall

Quote by slipperywhenwet2012
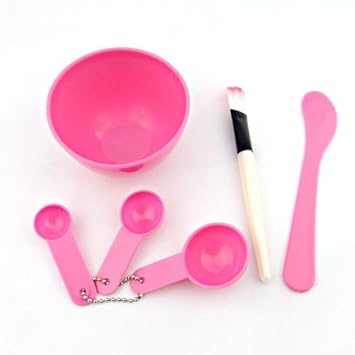
Body smoothie (do not eat/drink). She talks about other stuff...the 'smoothie' starts at around the 2:45 mark.

Quote by Dancing_Doll
I've recently come into some raw shea, cocoa and mango butter (long story) and I've been looking at recipes online for a non-heavy/non-greasy version of lotion but they all seem to be for heavier concentrated body-butter creams.
Is there a way to make a lighter lotion? Would you make it the same way as in this tutorial but just add in water or aloe water? If anyone has experience with DIY creams, please share.
Also - how can you tell when a cream goes bad? Will it be obvious? Does the consistency or scent change?
I'm a total newbie at this.
PS. This was a great tutorial. Much more detailed and easy to follow than many of the ones I've checked out before.
"What is the quality of your intent?" - Thurgood Marshall

Quote by slipperywhenwet2012
If you check out her site, she has tons of different recipes for lotions and things like that. So maybe you can find one that works for you.
As far as making it less greasy, I'd just cut the amount of the concentrated oils/extracts that she uses. Don't hold back completely, because you need the oils and such to get the consistency of lotion...otherwise you'll just have a bunch of blended butters.
Also, the first time I made this, it was a bit thicker than I normally like. But she only blended hers for about 30 seconds or so. I blended a bit longer than that and it gave me this really nice, whipped texture. And that doesn't just apply to just this recipe. If you're using a recipe that uses lots of oils, just blend it a bit longer if you want a lighter texture. A little water won't hurt...but be careful as oil and water/butter doesn't really mix. I sometimes add rose water.
And when it goes bad, you can smell the difference. It's hard to describe. It just doesn't smell...right. Also, the ingredients sort of begin to separate a bit. She says in the tutorial that to make a new batch every couple of weeks or so...but for me it starts going bad after around 9 or 10 days. Granted I don't keep it stored in a cabinet or anything. Just out in my bathroom where I shower at least twice a day, so it may be affected by that.
The best thing to do is trial and error. I know our skin is nothing to play around with, but it's really the only way to see what does/doesn't work. I was freaked out by trying DIY stuff for my skin because mine is so sensitive and I can't afford to make too many mistakes with it. But you really can't go wrong with raw/organic ingredients. It's just a matter of how it makes your skin feel and how comfortable you feel using it on a regular basis.

Quote by Dancing_Doll
Thanks for the tips! I did read that if you add water etc it should be warm as well and then slowly whipped into it to prevent separation but yeah, maybe I should just stick to basics for my first try. And I will definitely remember to make small batches. My first instinct would be to make a huge jar of it that would last for months but clearly that's the wrong way to go.
Quote by SereneProdigy
I'm planning on making a Vitamin C serum, which usually only contains water and ascorbic acid (vit C crystals). On the skincare forums I've read, some people complained that the serum they obtained was too watery, and that it fell from their faces instead of 'sticking' there. Some people recommended the use of glycerin instead of water, to make the serum a bit heavier.
I have no idea about the consistency of the lotion you're trying to create, but you could try adding glycerin to the mix to alterate it, instead of water.
You can buy glycerin in any pharmacy, and it's harmless on the skin (you could even drink/eat it). It's used as a solvent/base in many skincare products, and has moisturizing and preservative properties.
http://en.wikipedia.org/wiki/Glycerol
"Glycerol is used in medical and pharmaceutical and personal care preparations, mainly as a means of improving smoothness, providing lubrication and as a humectant. It is found in allergen immunotherapies, cough syrups, elixirs and expectorants, toothpaste, mouthwashes, skin care products, shaving cream, hair care products, soaps and water-based personal lubricants. In solid dosage forms like tablets, glycerol is used as a tablet holding agent. For human consumption, glycerol is classified by the U.S. FDA among the sugar alcohols as a caloric macronutrient."
"Glycerol is a component of glycerin soap. Essential oils are added for fragrance. This kind of soap is used by people with sensitive, easily-irritated skin because it prevents skin dryness with its moisturizing properties. It draws moisture up through skin layers and slows or prevents excessive drying and evaporation.[citation needed] With similar benefits, glycerin is a common ingredient in many bath salts recipes. However, some assert that due to glycerin's moisture absorbing properties, it can be more of a hindrance than a benefit."
I'll keep you informed about my Vitamin C serum when I receive my ascorbic acid crystals and try the mix on my face. Vitamin C is in the top 5 ingredients that your skin can benefit from, so it sounds promising (antioxidant + collagen synthesis).
"What is the quality of your intent?" - Thurgood Marshall
Quote by slipperywhenwet2012
I've actually heard of the Vitamin C serum...and it sounds uncomfortable. The ascorbic acid thing definitely gave me pause. The reviews are mixed. It's not a method that works for about 40% of people that try it. I've also heard it burns. Quite literally. Some described the process as burning wrinkles away. They'd get tender...and then they would flake and peel away. Some even said it did the opposite of what it was supposed to. Tarnishing skin and making it duller instead of giving it a healthy, natural glow.
Again, this didn't happen in all cases. But that's definitely not a risk worth taking, at least not for me. Especially since the serum is an anti-aging formula, and is more of a cosmetic thing than a necessity.
At any rate, good luck. Proceed with caution. Hope it's worth it.
Quote by SereneProdigy
Yes, I've read the same things exactly. Apparently it only works for 60% of people. The reviews I've read were either 1/5 or 5/5, so the results are really all or nothing. But it's worth trying I guess. When you buy skincare products containing Vitamin C, more often than not it's a scam as Vitamin C oxidizes rapidly in solution and the concentration must be rather high to be effective.
The thing is, the solution has to be acidic to affect the skin properly : "ascorbic acid must be formulated at pH levels less than 3.5 to enter the skin". The most effective concentration is 20% (evaluated scientifically), but it is recommended to create a 5-10% serum and use it more frequently instead, to reduce irritation. Maybe the bad reviews were made by people who didn't dilute Vitamin C enough.
"What is the quality of your intent?" - Thurgood Marshall

Quote by Dancing_Doll
Thanks for the tips! I did read that if you add water etc it should be warm as well and then slowly whipped into it to prevent separation but yeah, maybe I should just stick to basics for my first try. And I will definitely remember to make small batches. My first instinct would be to make a huge jar of it that would last for months but clearly that's the wrong way to go.
"What is the quality of your intent?" - Thurgood Marshall

Quote by SereneProdigy
I'll keep you informed about my Vitamin C serum when I receive my ascorbic acid crystals and try the mix on my face. Vitamin C is in the top 5 ingredients that your skin can benefit from, so it sounds promising (antioxidant + collagen synthesis).

Quote by Dancing_Doll
It almost sounds like a kind of chemical peel?

"What is the quality of your intent?" - Thurgood Marshall

Quote by slipperywhenwet2012
It's kind of the same idea, yes. But chemical peels are more immediate and happen in a matter of minutes.
This process takes a matter of days. So your flesh gets red and tender and swollen and peels/flakes away slowly over time. Even people who had good things to say about this described the process this way...quite painful and uncomfortable, but once it was over they said their skin never looked better.
It's definitely an option...and a worthwhile one for some people. It just depends, I suppose. Some people added oils and they said it helped. Some people said they diluted the solution perfectly and they're still paying the price for just using it one time. It's a mixed bag, most definitely. And there isn't as much research on it as I'd like there to be.


Quote by Dancing_Doll
Oooh - I think I'll be skipping the crayon lippy. I like the natural stain from a cherry popsicle but then you get the cherry tongue too. I'll be best sticking with my pretty glosses. lol
Since it's one of my fave looks - I'll add this recipe for Sea Salt Spray to get beachy waves. Perfect for this time of year.
** I got this original recipe from Glamour.com and it gets rave reviews. **
You Will Need:
*A clean spray bottle. You can find them super cheap at dollar stores, grocery stores, and mega marts. Make sure it holds at least 8 fl. oz. to 10 fl. oz.
*8 fl. oz. of water. Try distilled or filtered if your tap water isn't the best on hair
*Sea salt. I used the more finely ground stuff because it mixes easier and faster with the water. It cost me $2.19 for a large canister of it. Use 1 tsp for each 8 fl oz of water.
*Coconut scented conditioner. It doesn't have to be expensive conditioner - I used Suave brand for $1 at the dollar store. I mostly added this for the "beachy" scent but it helps counteract the drying that the salt will do. I used 1/2 a tsp - use more if you have extra dry hair.
*A dab of hair gel. Unscented, preferably—otherwise it will interfere with the coconut scent of the conditioner). Usually the cheaper brand are more runny and mix better.
Optional add-ins:
* Essential oils: If you have dry or coarse hair, this is a good add-in. They will help condition your hair and add some shine. Choose whatever scent you want - ylang ylang works great for sensitive skin and problem scalps. Rosemary is great to help deepen the color of brunette's hair and chamomile brightens blonds. Lavender works beautifully too for all hair types. Use 3-5 drops.
* Tea Tree Oil: Great for sensitive and oily scalps. If you have oilier hair, this is the best oil to add for you since it won't make your hair oilier or weigh it down. Use 3-5 drops.
* More sea salt - You can add a little more if you have oilier/thicker hair. The more salt you use, the more it will dry out your hair. BUT the more you use, the "beachier" your hair will look and the more hold there will be. If the recipe doesn't have enough salt for you, add 1/4 tsp at a time until you reach the desired level. Make sure to record your changes so you know how much to add when you want to make more!
Instructions:
Add all your ingredients to the spray bottle and shake it until it mixes together. Any oils added will never fully combine well with the water so you'll have to shake it a little before each use. If your hair gel and/or conditioner don't combine you can try warming the mixture in the microwave (remove any metal pieces and don't use until cool!) to see if that helps - if it doesn't, you may have used too thick of a conditioner/gel. Spray your hair and scrunch. Don't forget to flip your head over and get the underside of your hair - this will give you more volume. You can let it dry naturally or use a blow dryer/diffuser to speed it all up.
"What is the quality of your intent?" - Thurgood Marshall
Quote by slipperywhenwet2012
But now that I know this method works with a homemade mixture, I may actually invest in professional sea salt sprays that come with the essential hair nutrients in it that keep the sea salt from drying out your hair.
Thanks for the recipe...it was perfect!

Quote by Dancing_Doll
Yay! Glad to hear it worked out. You'd be surprised at home basic some of the professional mixtures are. The John Masters one for example, is literally just saltwater and lavender oil. I do find it a bit drying on its own so I just use a light spritz and then use a couple of drops of Biosilk or Moroccan oil on the ends.
I've heard KMS makes a good sea spray product - it seems to get good reviews.
I still miss John Frieda's Beach Blond Ocean Waves - that was my fave but it's discontinued.

Quote by Dancing_Doll
I've recently come into some raw shea, cocoa and mango butter (long story) and I've been looking at recipes online for a non-heavy/non-greasy version of lotion but they all seem to be for heavier concentrated body-butter creams.
"What is the quality of your intent?" - Thurgood Marshall

Quote by slipperywhenwet2012
How has the experimentation with mango butter been coming along? My mom knows I'm into the organic skin care thing so she randomly sent me some...and I've found some good stuff on the interwebz. But wanted to ask since you've had a chance to play with some.
I've been thinking of concocting some kind of raw sugar/mango/peppermint scrub, so I have some questions about how the mango butter would hold up. How's the consistency? And if you've mixed it with other butters or oils, how'd it work out?


Quote by Dancing_Doll
Have you done anything with the mango butter yet?
"What is the quality of your intent?" - Thurgood Marshall

"What is the quality of your intent?" - Thurgood Marshall